Showing posts with label .net source code. Show all posts

Wednesday, 11 January 2017

Publishing a ASP.NET MVC Site or WebApi to a Docker Machine locally in Windows on Windows Server.

It happens sometimes you will want to develop a single project application. One of those, proof of concepts you do to learn new stuff. The problem comes when you have to stop doing Micky Mouse applications and move to a different world where environments and continuous integration becomes the core of the development.

This is where a new position has risen to help the devs, they are called the DevOps. The issue with DevOps, it is sometimes they have too much work to to, so they can be solving your own problems. Especially if you are doing continuous integration in Azure or Amazon AWS.

This is where Docker becomes a big player, we have a tool it is sophisticated enough to do the job, and it is simple enough to be used by devs. Docker comes from the Java and Linux world, so I thought it will be interesting to try to create a Docker image to run .NET stuff.

So step by step…. the first step will be to create a MVC or WebApi application, ASP.NET 4 or ASP.NET Core whatever you prefer.

image

Step 2: Right click in your project (in my case web) –> Publish…

Step 3: Click on custom and enter DockerDeployment and click OK

image


Step 4: In the Publish method with the drop down list select File System and in target location, select c:/docker

image


Step 5: Click Next->select release->select Publish

image


Step 6: It is time to play with Docker. Install Docker (the beta version) https://docs.docker.com/docker-for-windows/ 
and right click on the task bar, then select “Switch to Windows containers…”

image


Step 7: Create a file called “Dockerfile” in c:\docker and paste this (see below). This code will get the code from your deployment and will put it in the image microsoft/aspnet copying the data to the root folder

FROM microsoft/aspnet

WORKDIR /inetpub/wwwroot
COPY .  /inetpub/wwwroot

Step 8: Open powershell with admin permissions, and go to the C:\docker folder and execute this command:
image

This will execute the Dockerfile script and will create a new instance


Step 9: It is time to run your instance, just type:

image


Step 10: You can list the images by doing a Docker ps . Get the first 3 digits of the CONTAINER ID, in this case 989

image


Step 11: It is time to know your URL. just type the following and you will get the URL of your docker machine
docker inspect -f "{{ .NetworkSettings.Networks.nat.IPAddress }}" 989

image


Step 12: If you want to access to your local machine you can do things like this (where 989 is the Container Id)

Access to MS-DOS: docker exec -i –t 989 cmd

image

To Create a new Site, use this DockerFile (we called the web Webgenerator):
FROM microsoft/aspnet
SHELL ["powershell"]

RUN Install-WindowsFeature NET-Framework-45-ASPNET ; \  
    Install-WindowsFeature Web-Asp-Net45

COPY WebGenerator WebGenerator 
RUN Remove-WebSite -Name 'Default Web Site'  
RUN New-Website -Name 'WebGenerator' -Port 80 \  
    -PhysicalPath 'c:\WebGenerator' -ApplicationPool '.NET v4.5'
EXPOSE 80

CMD ["ping", "-t", "localhost"]  

Thursday, 3 March 2011

The SaveAs2() Issue in MS Word 2010 and the Com Exception error.

If at some point you get an error by calling the SaveAs method in Microsoft Word when you are working with SharePoint 2010 at the same time, just do the following.

1- Deactivate all teh features,

2- Click MSWord on File->SaveAs, and type a Sharepoint Location.

3. After saving it, check in that file.

4. Close Word and open it again. It will work

This is the line of code that it could bring you some headaches:

_DocumentToBeSaved.SaveAs2(

ref _sFileName, ref _oObj, ref _oObj, ref _oObj, ref _oObj, ref _oObj, ref _oObj, ref _oObj, ref _oObj, ref _oObj, ref _oObj, ref _oObj, ref _oObj, ref _oObj, ref _oObj, ref _oObj);

Tuesday, 12 October 2010

Changing the title of one announcement with event receivers.

Sometimes we will need to do something by firing some events. These event, that I described in my previous post are part of Sharepoint 2010.

We can find five basic different types of events:
1-List Events
2-List Item Events
3-List Email Events
4-Web Events
5-List Workflow Events

Because we are going to reproduce some kind of event in one of the lists we will need to choose "List Item Events". The event source will be Announcements, and the handle event will be called (...).

In order to do this we will have to override ItemAdded by calling this method:
public override void ItemAdded(SPItemEventProperties properties)

It is important to remember to use using(...) to avoid memory leakings, in this way, Sharepoint will be able to dispose the objects properly. As you probably don't know Sharepoint doesn't dispose some of the objects properly (ie: SPWeb).

Let's go to start building a new project. Go to Visual Studio 2010, clik on File->New Project->Sharepoint->2010->Event Receiver.

Name the project with AddingDateTimeToAnnoucement an follow the steps in the scheenshots.


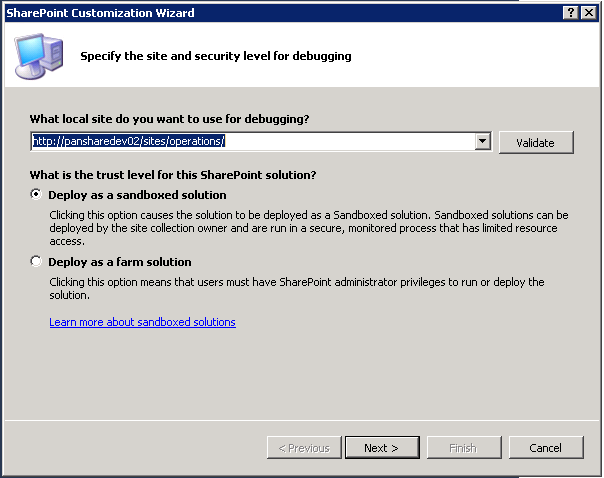
Select the solution as Sand box solution and pointed to the right URL


Click on Next and choose "List Item Events" and in event source "Announcements" and in Handle the following events tick "An item was added".


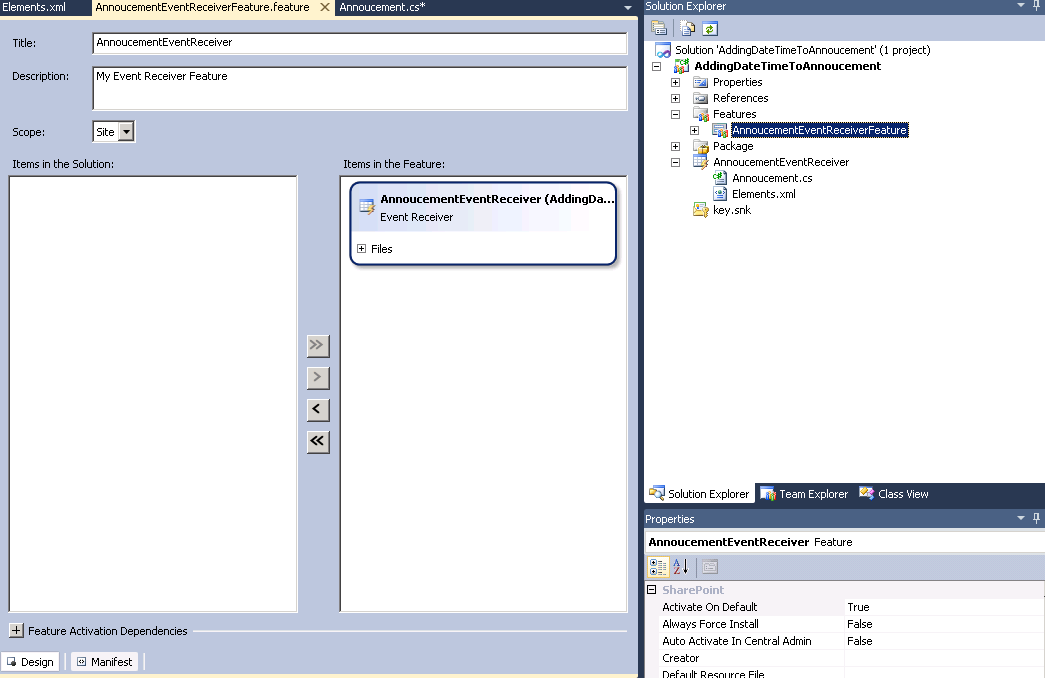
Rename the .cs class to AnnoucementEventReceiver.cs, go inside and rename the class as well with the same name. On features rename the feature1 to AnnoucementEventReceiverFeature. Go to "Elements.xml" and be sure that the xml code looks like this:


Be sure than in Features you choose Site on the "Scope:" so it should look something like this: (There is a mistake in the image "Annoucements.cs" should be "AnnoucementEventReceiver.cs")


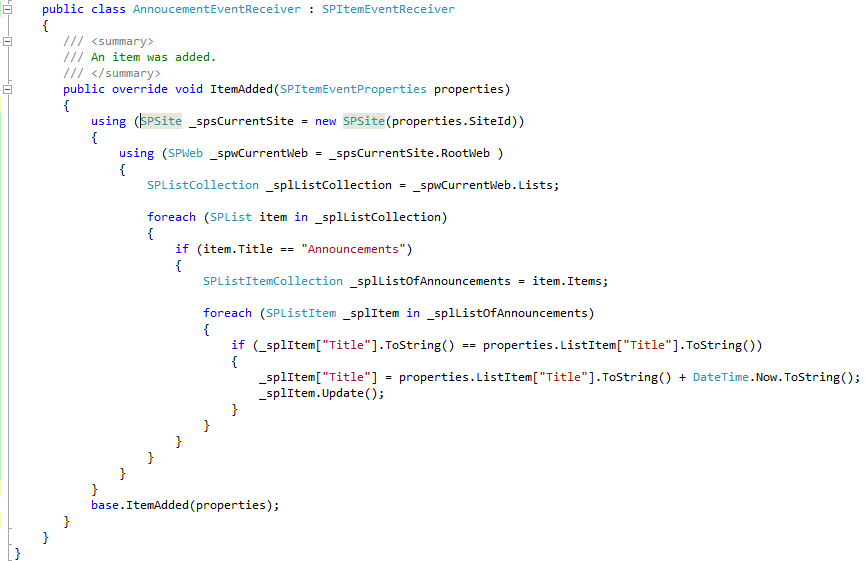
Copy and paste the following code into your class:
using System;
using System.Security.Permissions;
using Microsoft.SharePoint;
using Microsoft.SharePoint.Security;
using Microsoft.SharePoint.Utilities;
using Microsoft.SharePoint.Workflow;

namespace AddingDateTimeToAnnoucement
{
///
/// List Item Events
///

public class AnnoucementEventReceiver : SPItemEventReceiver
{
///
/// An item was added.
///

public override void ItemAdded(SPItemEventProperties properties)
{


using (SPSite _spsCurrentSite = new SPSite(properties.SiteId))
{
using (SPWeb _spwCurrentWeb = _spsCurrentSite.RootWeb )
{
SPListCollection _splListCollection = _spwCurrentWeb.Lists;

foreach (SPList item in _splListCollection)
{
if (item.Title == "Announcements")
{
SPListItemCollection _splListOfAnnouncements = item.Items;

foreach (SPListItem _splItem in _splListOfAnnouncements)
{
if (_splItem["Title"].ToString() == properties.ListItem["Title"].ToString())
{
_splItem["Title"] = properties.ListItem["Title"].ToString() + DateTime.Now.ToString();
_splItem.Update();
}
}
}
}
}
}
base.ItemAdded(properties);
}
}
}


You should be able to press F5 now. Go to "Lists" click on "Annoucements" create a new one and you will see how the title change with the title + the current date.

Enjoy